Head back to Documentation
Documentation
Ledger Nano S
The QRL development team has added some new features with the latest release we are very excited about.
The QRL developers have worked to trim bits and bytes to get the XMSS trees to fit on the Ledger. After the latest optimizations in the latest firmware one can now load multiple trees and store more than one wallet on the Ledger Nano S.
This guide will walk you through
- Installing the QRL App
- Initializing XMSS trees in the QRL App
- Accessing your QRL Wallets with the Ledger Nano S
- Receiving a transaction over the network - (Receive QRL)
- Sending a transaction over the network - (Send QRL)
- Checking transaction details on the QRL Explorer, including your current wallet balance
- Manually setting the OTS Key Index on your Ledger Nano S device.
Multi-Tree Support
This new feature adds the ability to store multiple XMSS trees on your Ledger Nano, Up to four (4) with the use of the new plausible deniability features. Each tree is limited still to 256 keys, however now you can sign up to 1024 combined transactions.
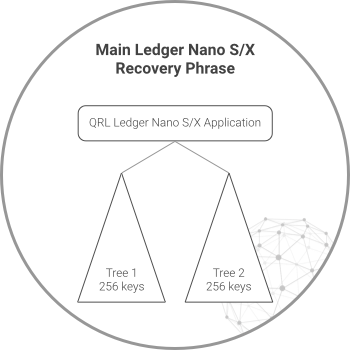
This feature will allow you to store 2 QRL addresses with 256 available transactions each on your Ledger from each profile enabled (Up to 4 addresses between 2 profiles).
When you reach the end of your first address OTS key pool, you have the opportunity to send all funds to the second address and continue using the Ledger.
Once both trees have been consumed you will have to transfer funds into a new address, and re-initialize the Ledger to generate new keys. Don’t worry too much though, the web/desktop wallet will warn you when your keys are close to running out.
Plausible Deniability
One of the most exciting features to roll out with this latest release is the ability to secure your funds from the “$5 wrench attack”. This new feature creates a secondary passphrase to open your Ledger device with.
This second account space allows another 2 QRL XMSS trees or Addresses to be created on the Ledger. To access the new account space on your Ledger you will enter the new passphrase you setup when you first power up the Ledger.
This will add an additional word to the 24 word mnemonic phrase, creating 2 word lists. The first being the typical 24 word Ledger recovery key, the second being the same 24 word phrase plus the additional word setup during configuration.
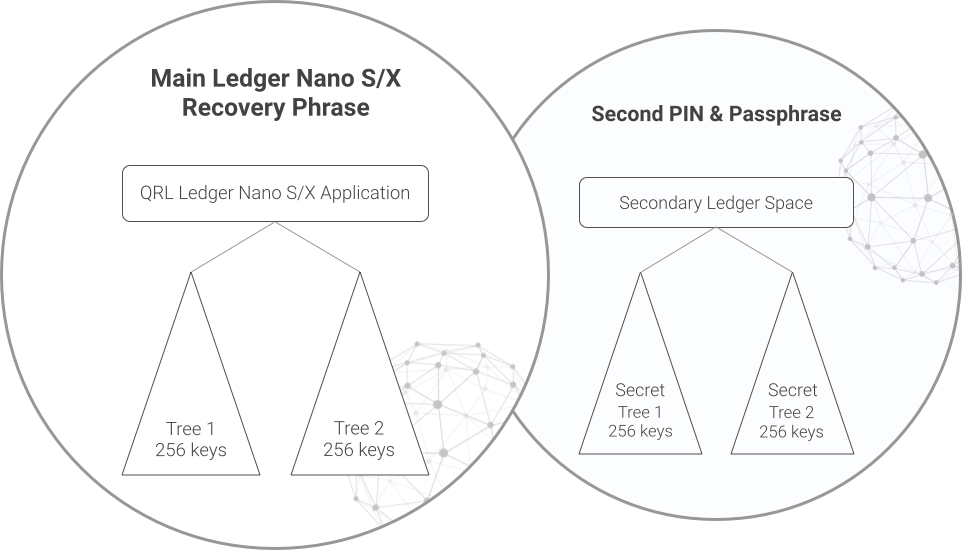
To read more on the setup and configuration of the second account space see this article from the Ledger team
This feature is optional and there is no way to tell from the Ledger if you have configured this extra space. Plausibly deniable and fully recoverable secure funds!
To setup the second address space, follow The official ledger guide. After you have secured the additional mnemonic word for the second space follow this guide again to initialize the 3rd and 4th QRL addresses.
Ledger Nano S Quirks
Being Quantum Resistant comes with some inherent challenges. Before using the QRL Ledger Nano S app for your wallet, there are a few quirks worth noting about QRL.
Private Keys
The Ledger will not print your QRL private key. This is stored on the Ledgers secure element, and the basis of what makes this device so secure.
You will be presented with a private key to restore your Ledger device during the initial setup. Any application secrets will be tied to this private key, and it is required to restore your wallet if ever needed.
Store your Ledger Device seed (mnemonic) somewhere safe, in an encrypted manner if possible (Recommended you have this information stored in multiple physical locations)
With the addition of plausible deniability there is an additional self-set mnemonic word that must be stored as well. This additional word can be up to 100 characters max and is case sensitive.
This additional word is needed as much as your 24 word mnemonic to be able to restore your funds. You can think of it as an extra 25th word that you can choose.
If you forget or lose your keys, nobody will be able to help you!
OTS Key Index
When you create a new wallet you create an XMSS tree, which is comprised of many one time use signatures. Every signature is referenced as your OTS index or One Time Signature key index. The Ledger will now hold 2 XMSS trees (QRL Addresses) in it’s memory space.
The OTS key index is limited. You can only use each key ONCE.
When you’ve used your last key, you will no longer be able to sign transactions. This cannot be stressed enough!
Your Ledger Nano S will keep track of OTS keys for you, however if you ever lose the device and need to reinstall on a new device, you will have to reset your XMSS index inside the QRL Web Wallet. You can rely on the state of the node you’re communicating with; however this will not keep track of failed transactions where a signature was broadcast to the network and subsequently failed. It is best to track all OTS key usage elsewhere to ensure you never reuse the same OTS key.
NOTE With your last key you must empty your wallet. If you use all of your OTS Key Indexes with funds in the wallet, these funds will be lost FOREVER (Don’t worry, there are plenty of warnings along the way.)
The QRL Web Wallet will provide ample warnings you are running low on OTS Keys (<=50) to ensure you have plenty of time to move your coins to a new address. It is up to you to move them, however!
OTS Key Tracking
It’s recommended that you track all OTS Keys used in a spreadsheet or similar media. The Nano S will keep track of your OTS keys for you, however if you ever lose the device and need to reinstall on a new Ledger Nano S you will need to know which OTS keys have been consumed,
The basic security of XMSS is based on using any key exactly one time.
The QRL software has been developed in such a way to help users track their OTS keys, it is ultimately up to the user to track and insure they have not re-used any keys.
Once you have restored your wallet on a new Ledger, manually set the XMSS OTS key index inside the QRL Web Wallet tools section. See below to Manually Set XMSS Index
You can rely on the state of the node you’re communicating with; however this will not keep track of failed transactions where a signature was broadcast to the network and subsequently failed.
NOTE It is best to track all OTS key usage elsewhere to ensure you never reuse the same OTS key.
Tokens and Messages
Currently the QRL Ledger Nano S app does not support the creation and sending of QR Tokens on the QRL Network. Only native Quanta (QRL) transfers and Message Transaction types and derivatives of are currently supported.
A future release of the QRL Ledger Nano S app will support token creation, sending and slave transaction functionality. In the mean time you can setup another address following our guide and use this for all on chain tool uses.
Installing the QRL Application
Using the Ledger Live application, follow these instructions:
- Open the Manager in Ledger Live
- Connect and Unlock your Ledger Nano S
- Allow the Manager on your Ledger Nano S device by pressing the right button when asked
- Search the App catalog for QRL, and click the Install button next to the QRL app.
- An installation window will appear, and your device will display Processing…
- The QRL App installation has completed on your Ledger Nano S
Initializing the QRL App
Before you can use the QRL Ledger Nano S App, it must first be initialized. The initialization process will generate an XMSS tree on your Ledger Nano S device, which is a unique aspect of the QRL Network’s signature scheme. This process only has to be completed once on your Ledger Nano S device. Please allow up to 45 minutes for this process to complete for each tree.
To initialize your Ledger Nano S device for use with the QRL App, follow these instructions:
- Make sure your Ledger Nano S device is Connected and Unlocked.
- Open the QRL app on your Ledger Nano S
- Your Ledger Nano S device will show QRL (Tree 1) not ready.
- Scroll down and press both buttons on the Init Tree menu option.
- Your Ledger Nano S device will show QRL (Tree 1) keygen: 001/256. This will slowly progress until all 256 keys have been generated.
- When this process has completed, your Ledger Nano S device will show QRL (Tree 1) READY rem:256 - indicating your device has finished generating tree 1 OTS keys, and you have 256 OTS Keys remaining in this Tree.
- Scroll down in the menu and chose Switch Tree with both buttons. You will now see QRL (Tree 2) Not Ready
- Initialize Tree 2 following the same steps above. Again this process will take about 45 minuets to complete.
Generating XMSS Tree 1 on the Ledger. This will take a while, have patience.
Your Ledger Nano S device has been initialized for the QRL app, and contains 2 addresses (XMSS Trees) ready to deposit funds to. 2 addresses contain 256 OTS keys each which can be used to sign transactions on the QRL network.
| QRL Tree | OTS Keys | Address |
|---|---|---|
| Tree 1 | 256 OTS | Q00040043096f536b68eb36ec3~~fe577d33e78f3c |
| Tree 2 | 256 OTS | Q000400c722c2198837153a697~~5ee40365da6ee2 |
Accessing Wallet with Ledger
- Make sure your Ledger Nano S device is Connected, Unlocked and the QRL App is Open.
- Select the tree to open by scrolling to Switch Tree in the QRL menu.
- Visit https://wallet.theqrl.org/ in your browser or open the QRL desktop wallet.
- Click Open Wallet on the left hand menu.
- On the right hand side, select Ledger Nano S in the drop down menu.
- Click the Open Ledger Nano S button.

This will present you with the unlocked QRL wallet ready to send or receive as seen below.
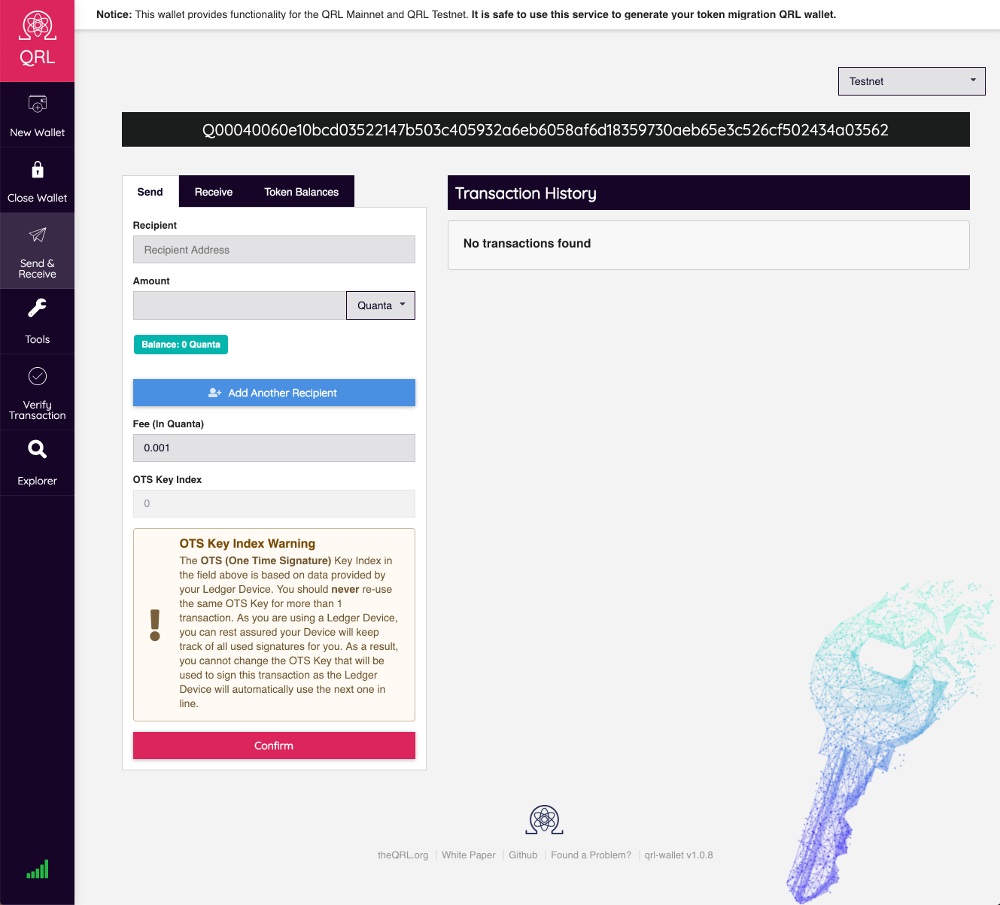
NOTE Ubuntu users may run into issues connecting to their Ledger devices. Please reference this article Fix-connection-issues from Ledger explaining the issue and solution.
NOTE Chrome Users, there is a bug with chrome that will not allow the Ledger to work. Please use another application or download the qrl wallet
NOTE If you are a Firefox user, ensure you have enabled u2f before proceeding. Enabling U2F support in Mozilla Firefox
Receive QRL
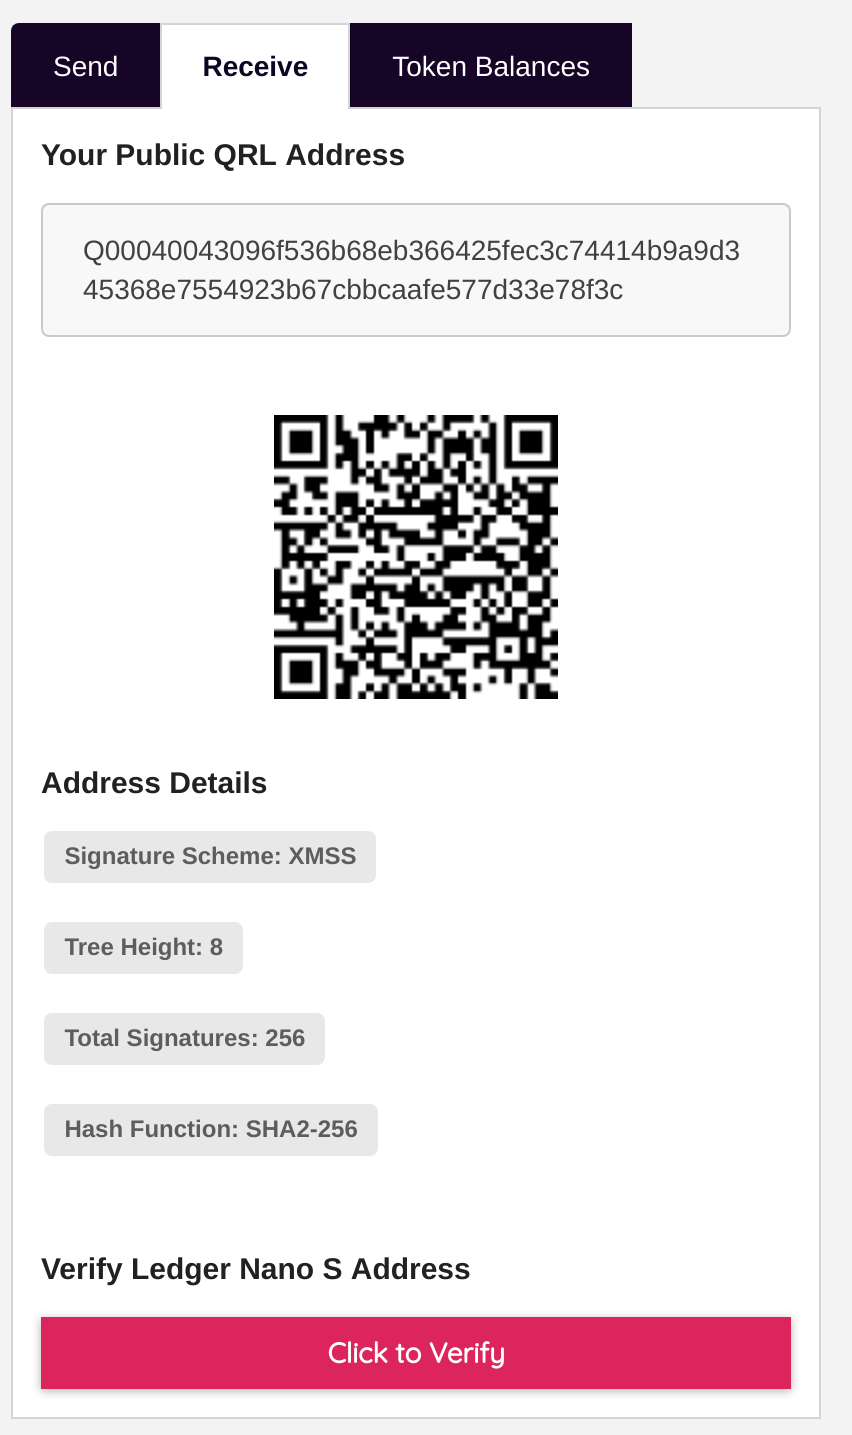
You should always verify the address shown in the QRL Web Wallet matches the address shown on your Ledger Nano S device. To confirm your address, click the Click to Verify button on the receive tab of the wallet.
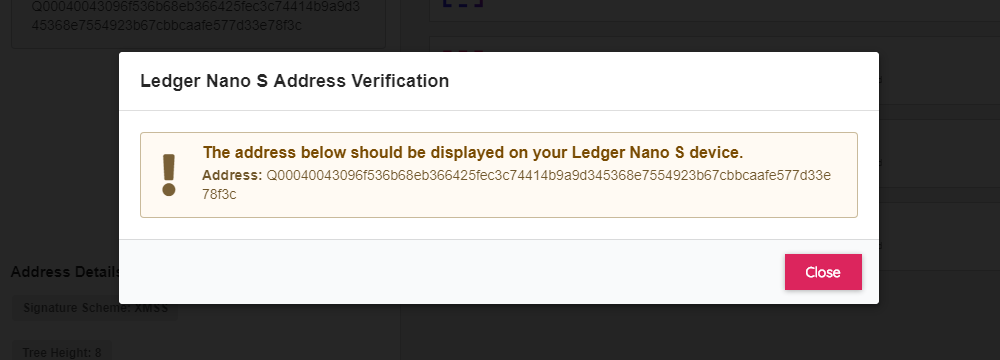
Your QRL address will appear on your computer, and on your Ledger Nano S device.

Once you’ve confirmed your address on both devices, you can send your QRL address to whomever you are receiving coins from.
NOTE In the event you find the addresses do not match, you should immediately reach out to the QRL Team to report the issue @ security@theqrl.org This could occur in the event a malicious actor has taken control of the QRL Web Wallet.
Send QRL
With the wallet unlocked, you can now send QRL.

To send QRL there are four fields you need to fill in:
| Field | Description |
|---|---|
| Recipient Address | A valid QRL address |
| Amount | How much QRL to send |
| Fee | How much you are paying to make this transaction |
| OTS Key Index | Enter an unused OTS Key should auto-populate |
Make sure everything is correct and click the confirm button. You will get another confirmation of your transaction details.
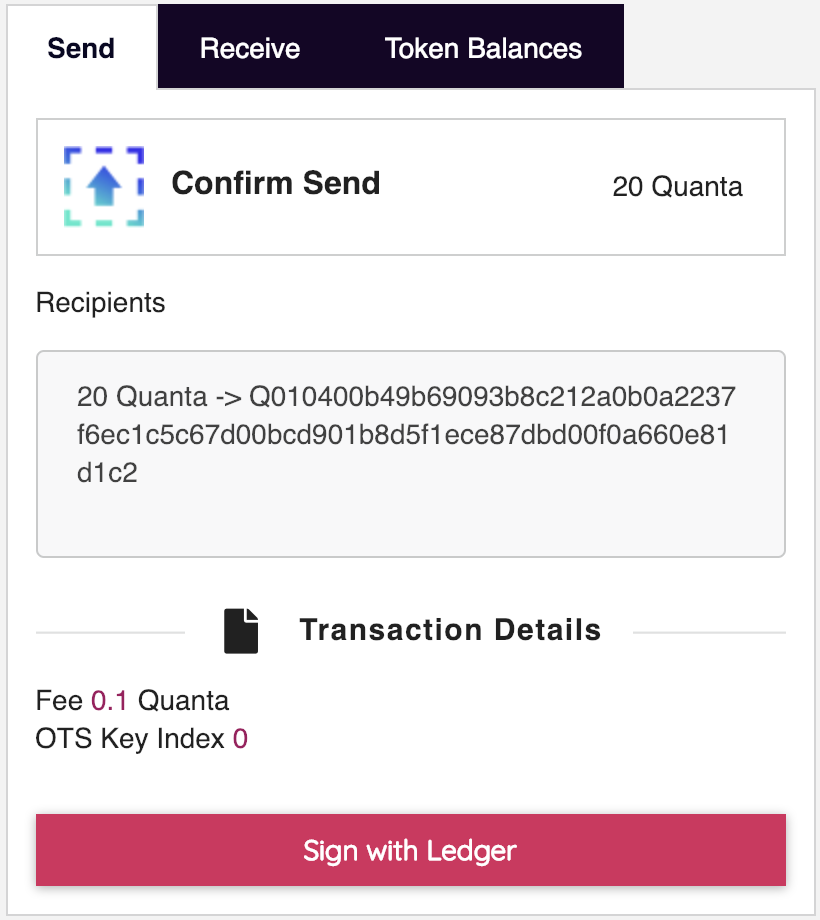
If you are happy with the transaction details, click the Sign with Ledger Button.
A window will appear prompting you to confirm the transaction details on your Ledger Nano S device.
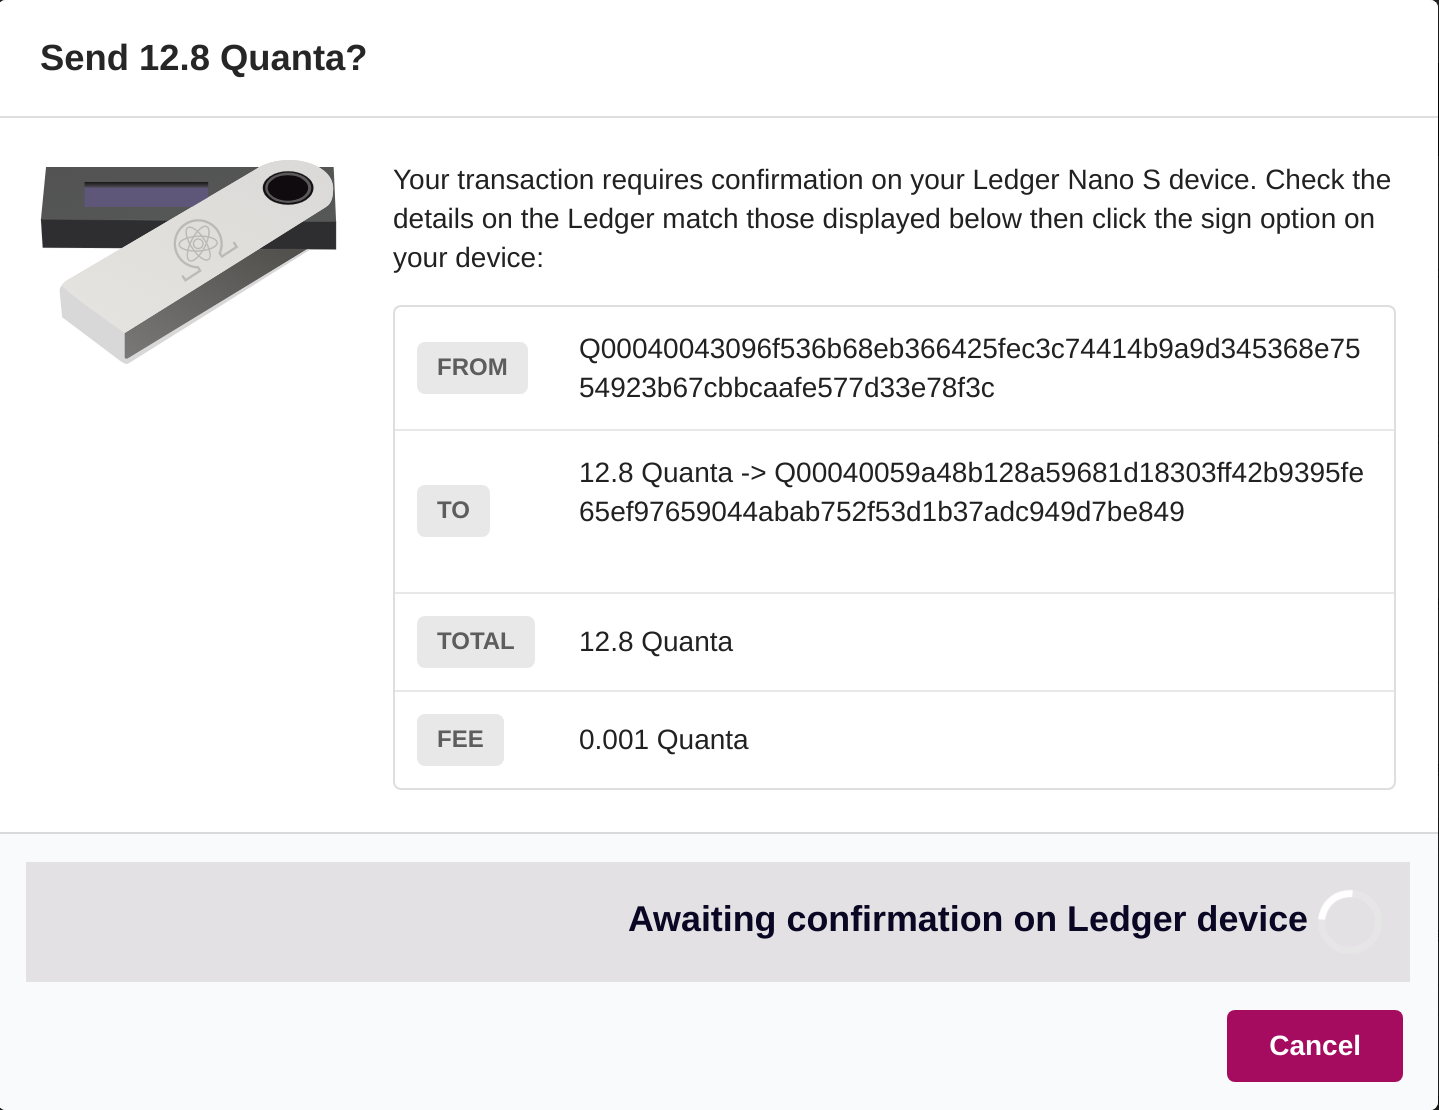
On your Ledger Nano S device, you can press View transaction to verify the From and To addresses, Amount(s) and Fee.
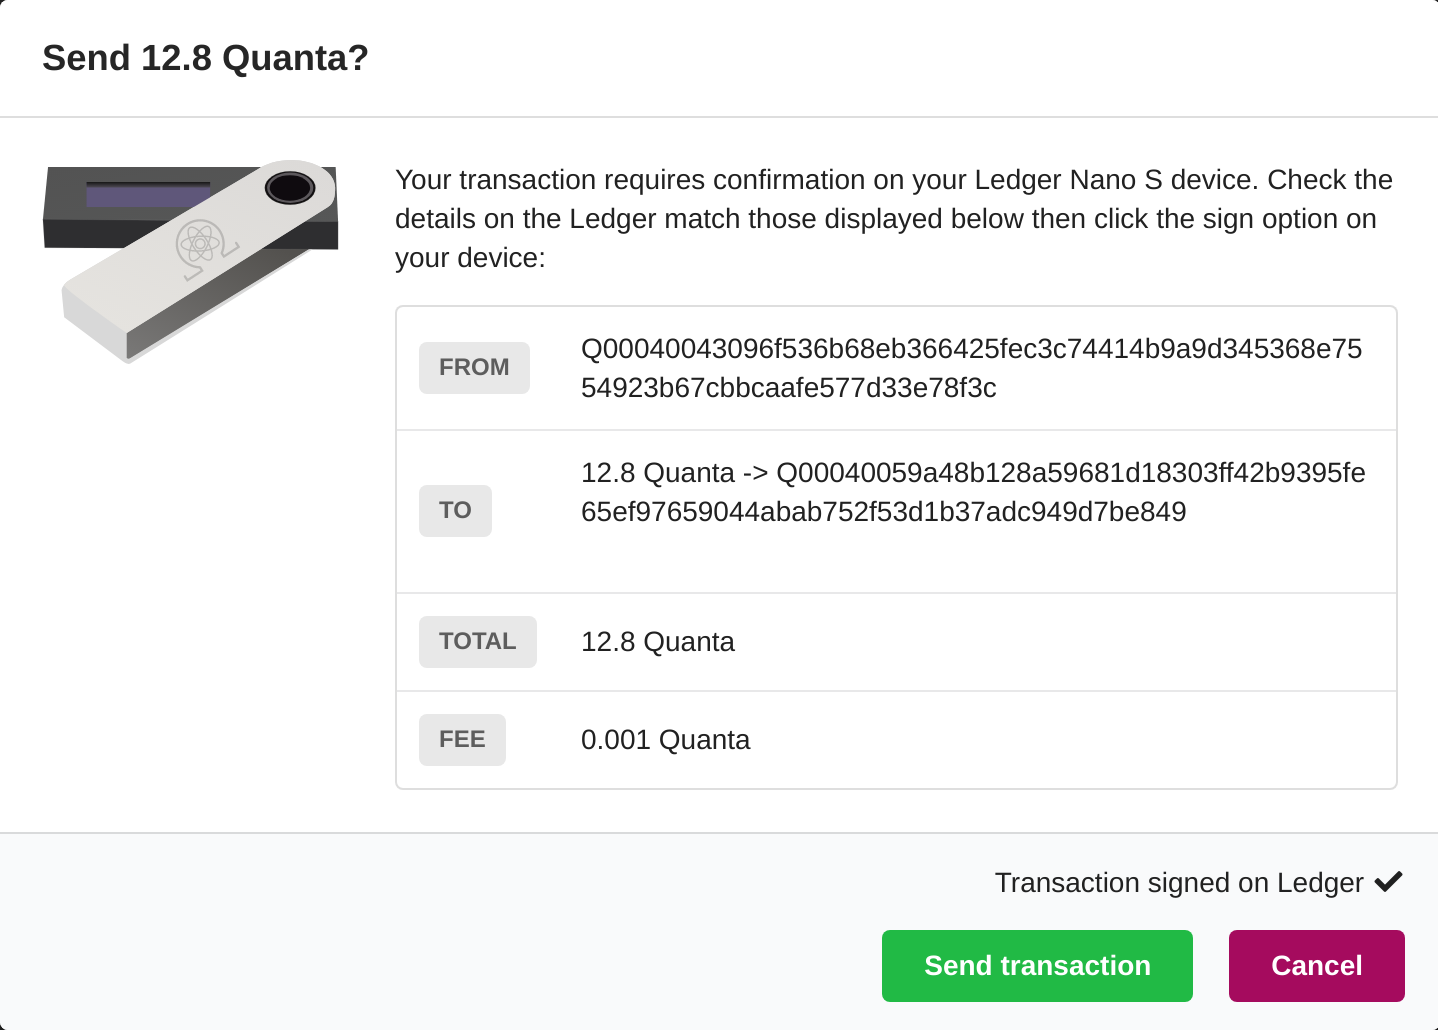
When you’ve confirmed these details, proceed to press Sign transaction.

Signing will take a few seconds. When complete, you will see the following back on the QRL Wallet.
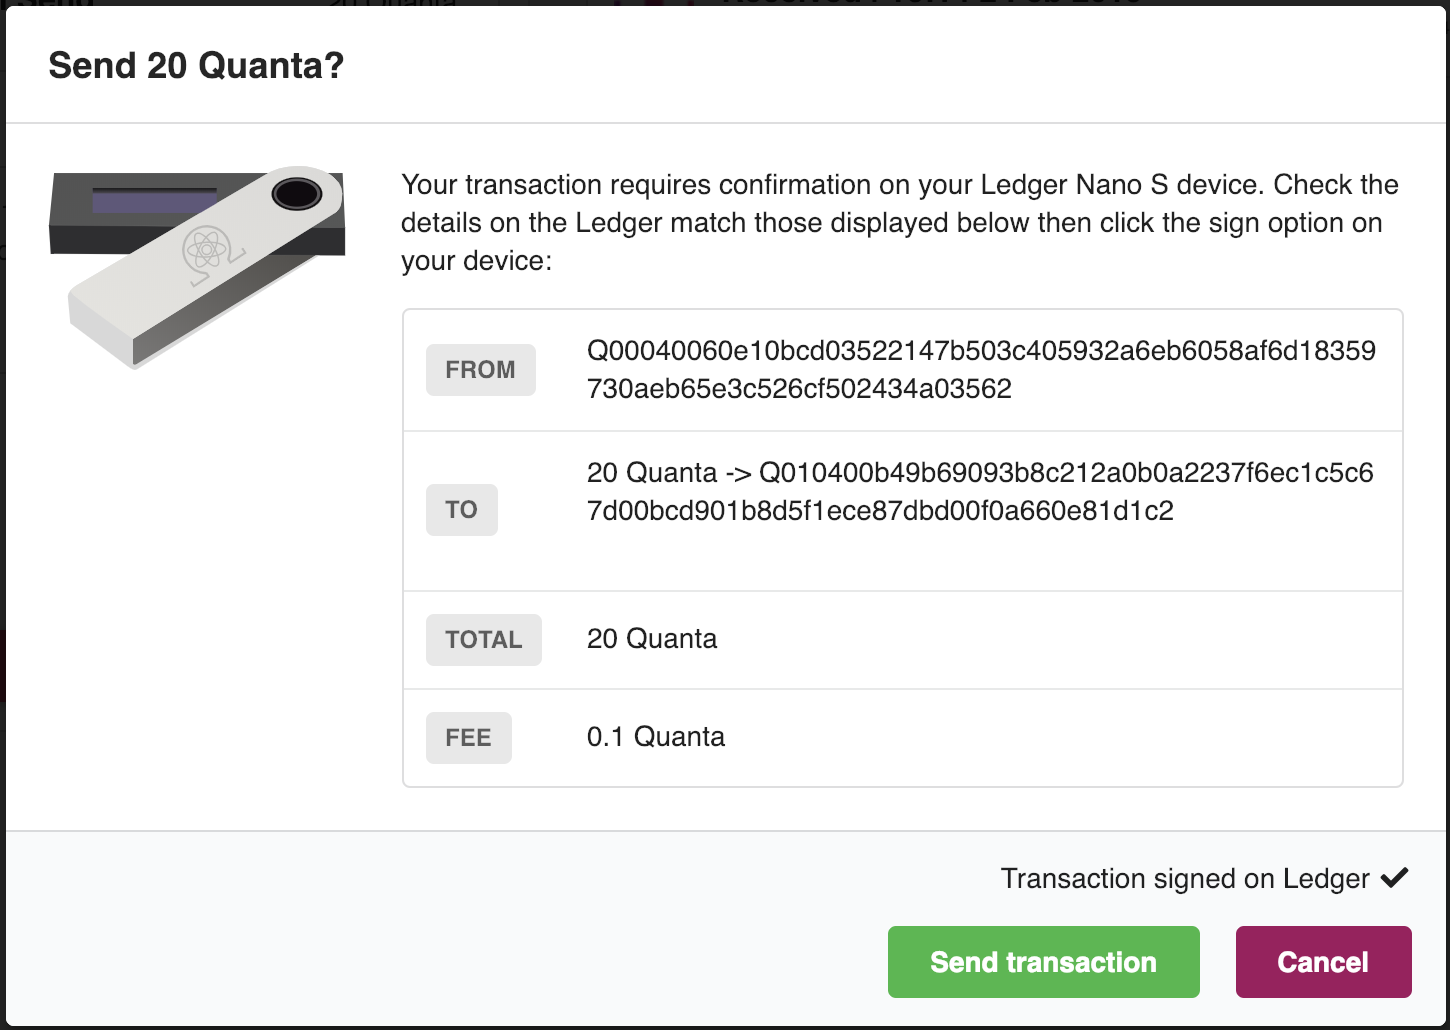
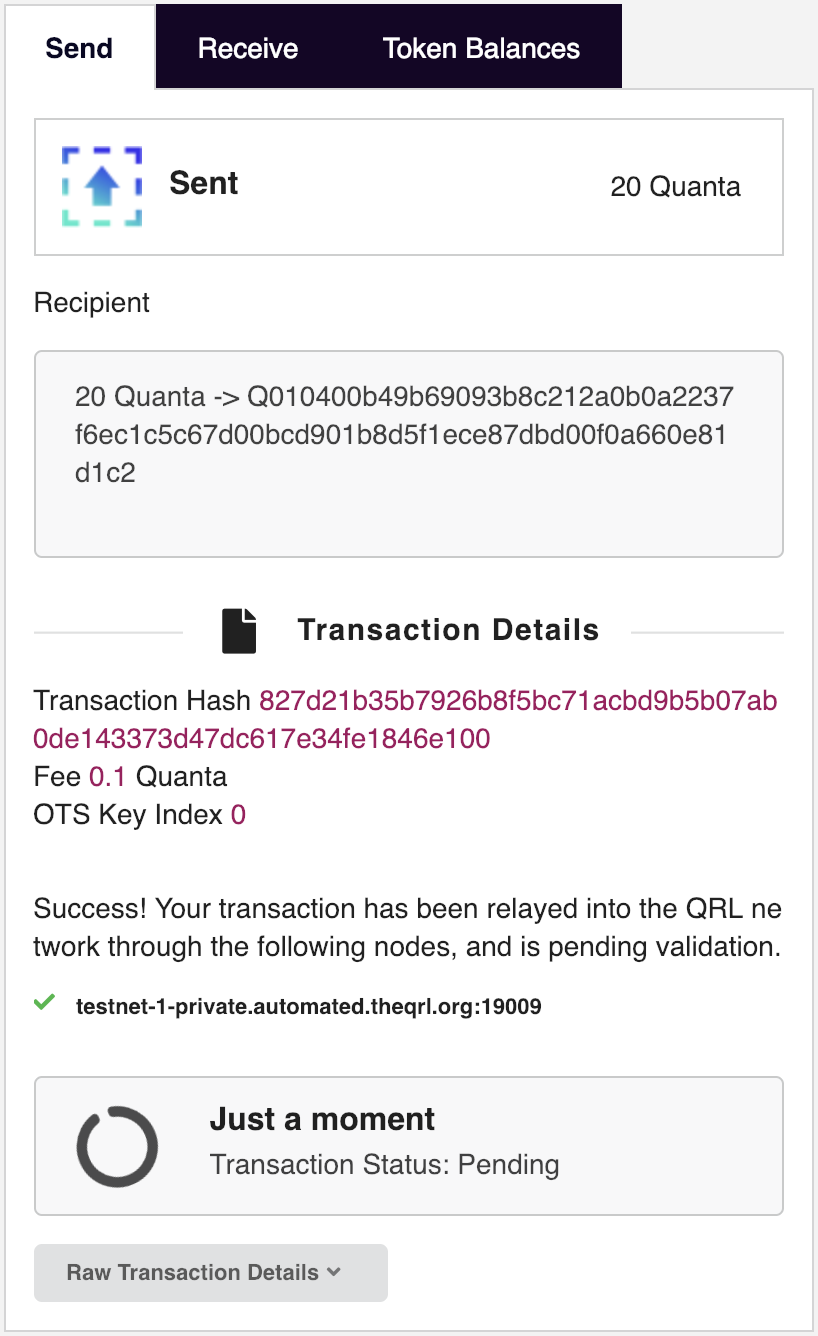
To complete the transaction into the QRL Network, click the Send transaction button.
You will see a progress tracker while your transaction is mined into a block.
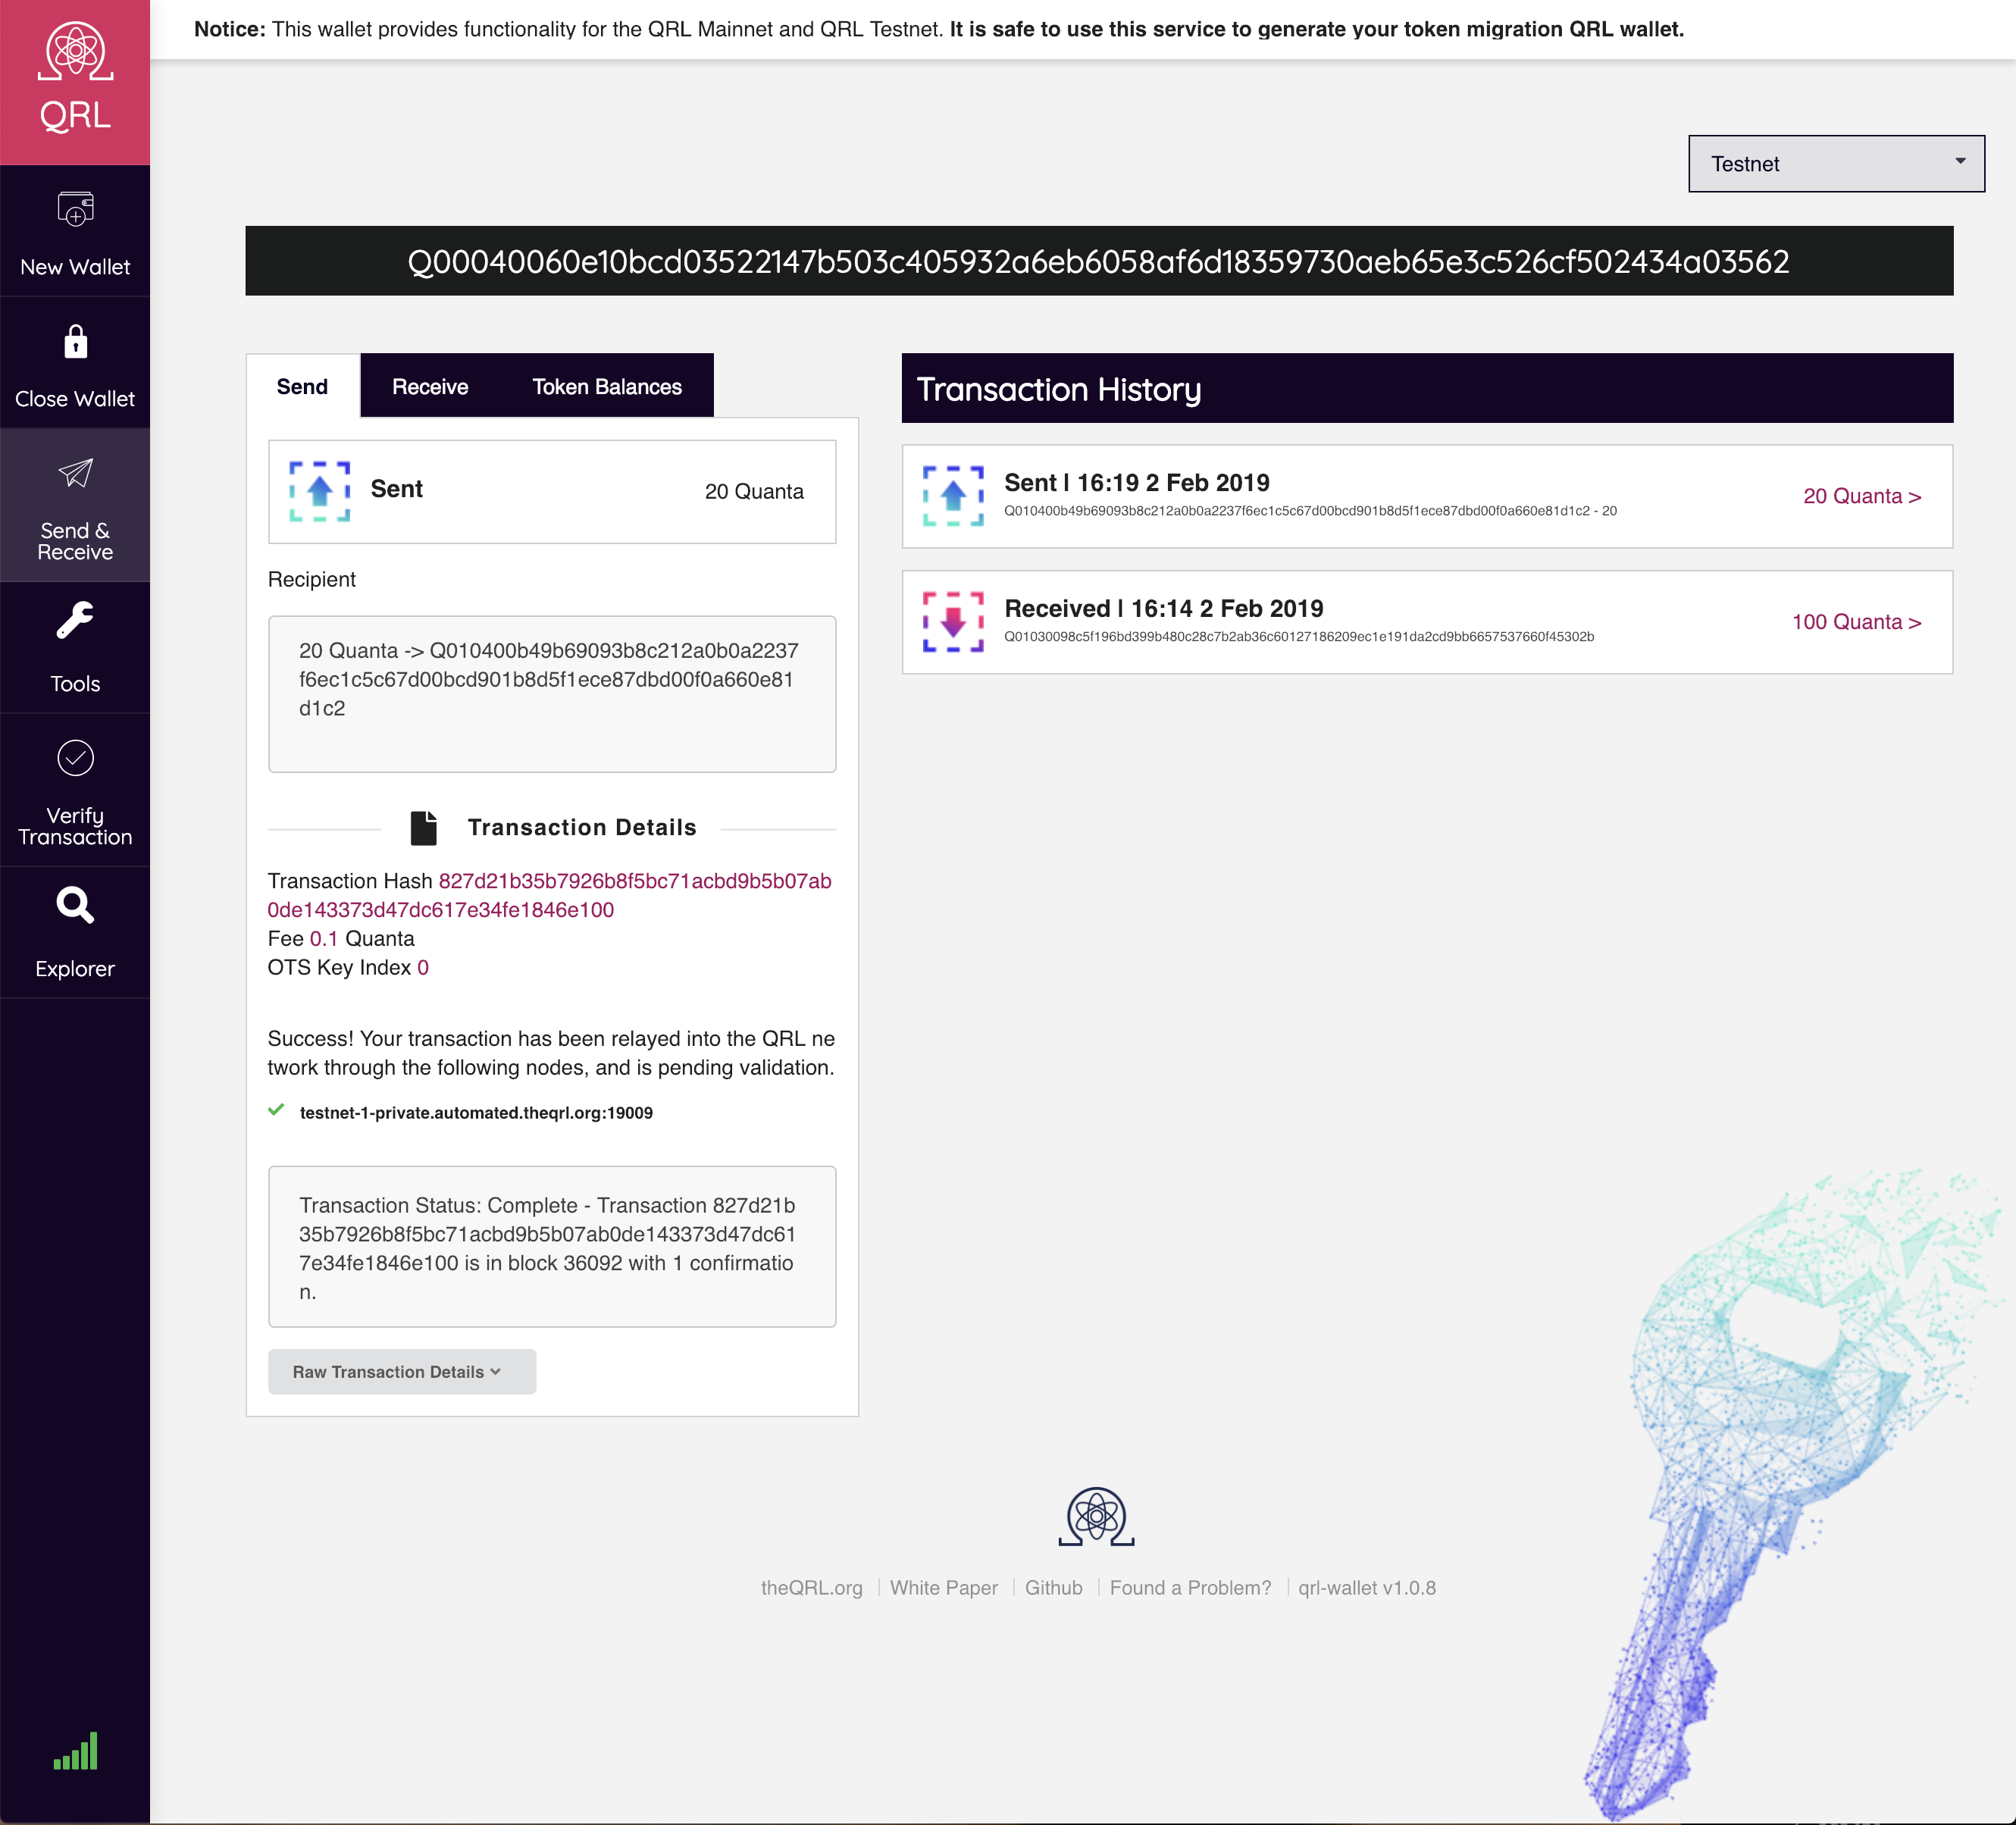
When the transaction is confirmed in the network, your Transaction History will automatically update to reflect your transaction. You can validate this using the Block Explorer
Check Wallet Balance
With the wallet opened you can see the balance in the main screen of the web wallet. You can also check your wallet balance without opening the wallet by browsing to the QRL Explorer and entering your address into the search field.
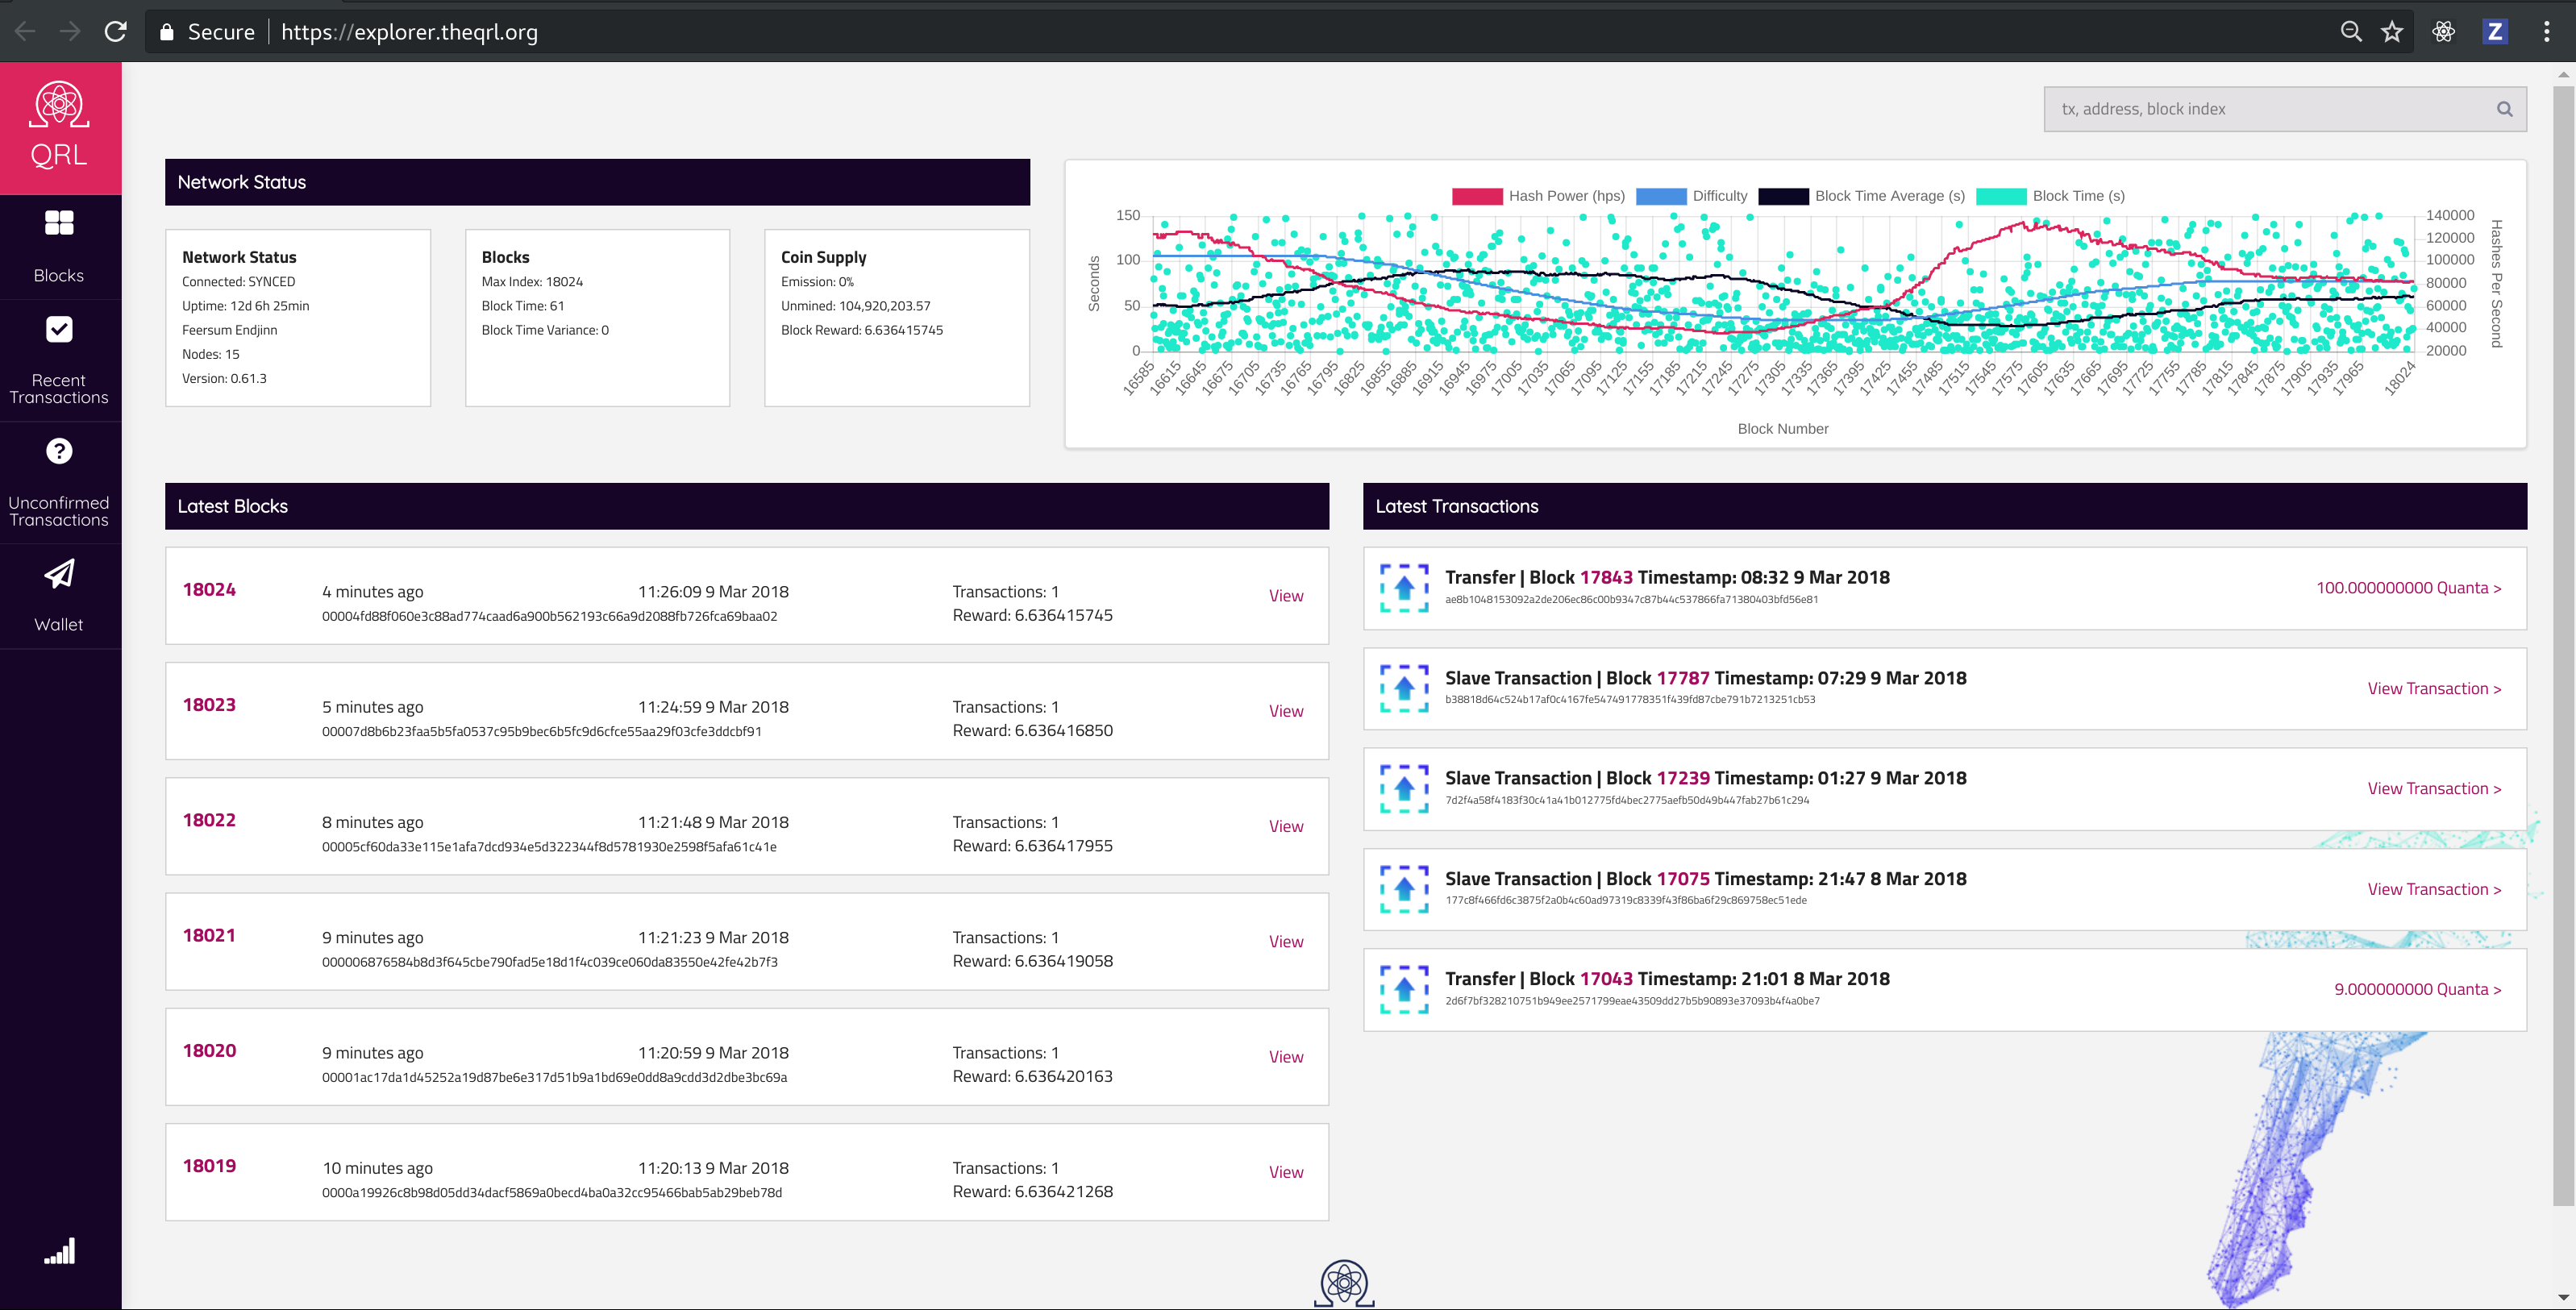
You will see all of the transactions the address has as well as the balance of quanta and any tokens held by the wallet.
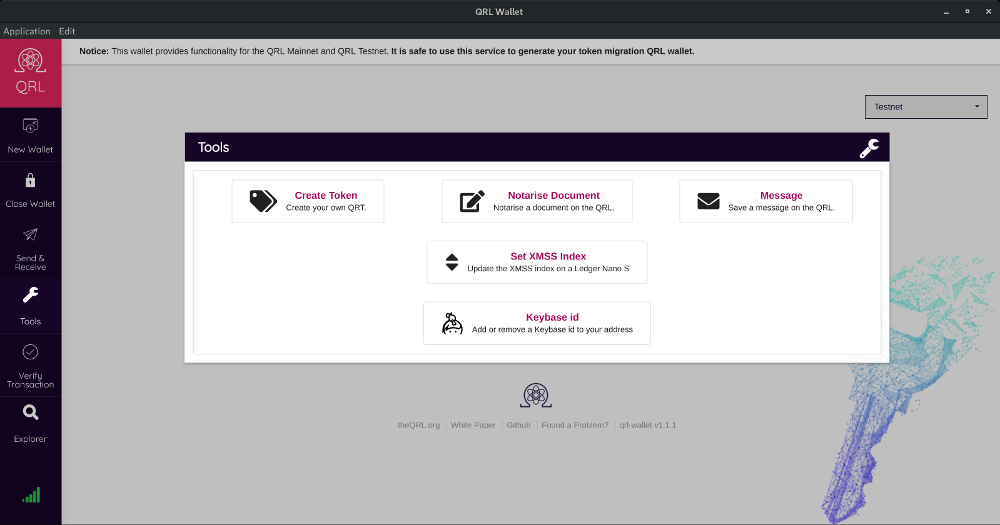
Manually Set XMSS Index
In the event you lose your Ledger Nano S device, or simply need to initialize or maintain the state of a second Ledger Nano S device, you can manually set the XMSS Index state on your Ledger Nano S device.
NOTE If you are a Firefox user, ensure you have enabled u2f before proceeding. Enabling U2F support in Mozilla Firefox
- Make sure your Ledger Nano S device is powered on, unlocked and the QRL App is open.
- Visit https://wallet.theqrl.org/ in your browser.
- Click Open Wallet on the left hand menu.
- On the right hand side, select Ledger Nano S in the drop down menu.
- Click the Open Ledger Nano S button.
- Click Tools on the left hand menu.
- Click Set XMSS Index.
- Carefully read the on screen instructions and completely the form accordingly.
- Click Save New XMSS Index. A confirmation window will appear, and your Ledger Nano S will ask you for confirmation.
- Your Ledger Nano S device will show WARNING Set XMSS Index New Value XX where XX is the XMSS Index you entered.
- Press the right button on your Ledger Nano S to confirm, or left button to reject the update.
QRL Ledger Nano S Video Demonstration
Click the image below to watch the video demonstration.

